25 DIY Halloween Decor Ideas for a Creative 2026
Ready to make Halloween decor feel more personal without spending a fortune? These DIY Halloween Decor Ideas turn simple materials into creative displays worth saving and sharing.
Halloween decorating does not have to mean filling every corner with expensive store-bought pieces. With paper, mason jars, cardboard, fabric, recycled containers, and a few seasonal accents, you can create decorations that suit your home’s style and budget. This collection brings together playful, spooky, cozy, and slightly gothic projects for beginners and experienced crafters alike.
You’ll find ideas for walls, windows, doors, tables, shelves, and party spaces, along with practical tips for choosing materials and arranging each display. In my experience, handmade pieces often become the decorations people remember most because they add personality rather than simply filling space. Pick a project that matches your skill level, gather your supplies, and start creating a Halloween home that feels uniquely yours.
Pumpkin Mason Jar Lanterns
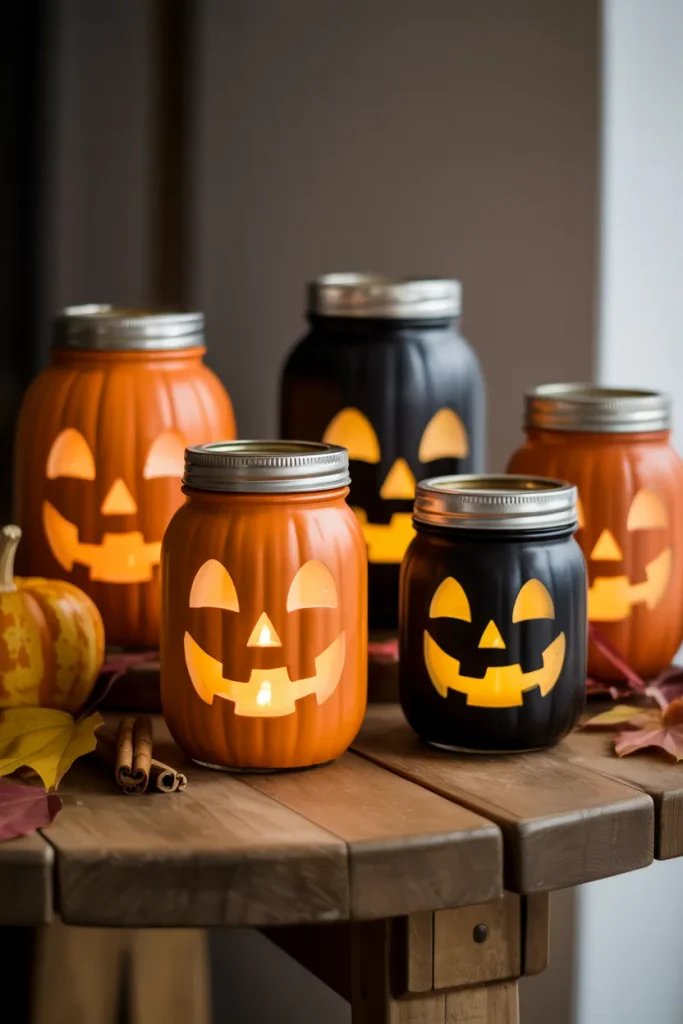
Mason jars become charming little lanterns with a coat of orange paint and simple black faces. Choose jars in different sizes so the display has height and movement. Battery-operated tea lights are safer than open flames, especially on busy entry tables or around children.
For an extra handmade touch, wrap thin jute twine around the jar neck and add a tiny paper leaf. In my experience, grouping three or five lanterns together makes a stronger display than scattering them around the room. Place them on a tray to keep the arrangement tidy and easy to move.
Pinterest Account : housedecorater56
Cardboard Bat Wall
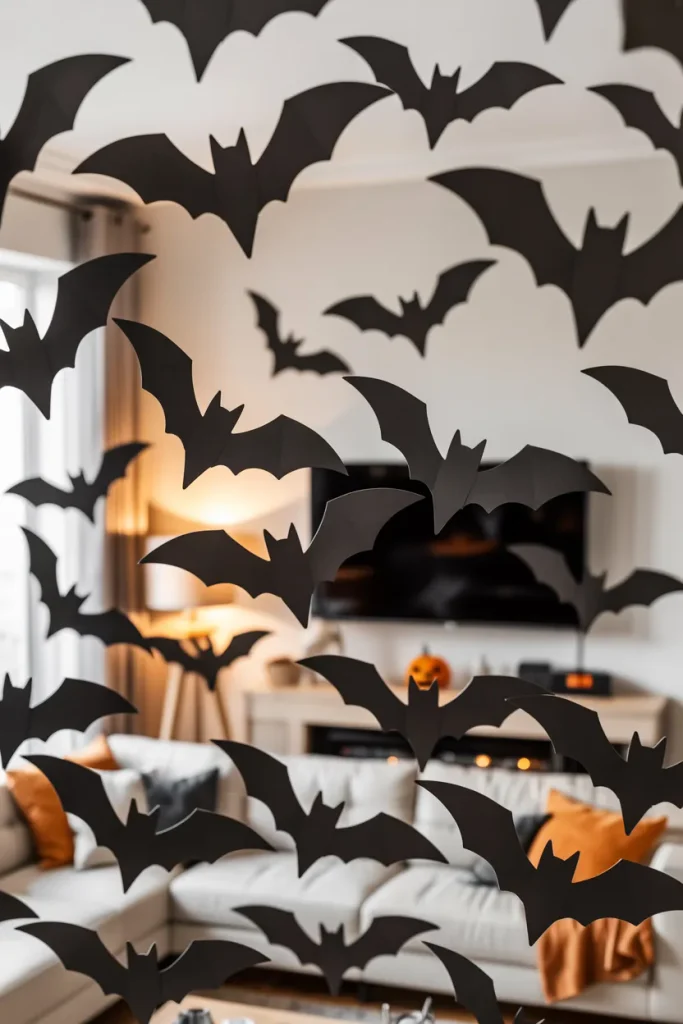
- Cut bat shapes from black cardstock or thin cardboard using one simple template.
- Fold each bat gently down the center to create a raised wing effect.
- Arrange smaller bats near the edges and larger ones toward the center.
- Attach them with removable adhesive tabs to protect painted walls.
- Curve the pattern upward near a doorway, mirror, or gallery wall.
A handmade bat swarm gives plain walls instant Halloween character without buying bulky decorations. For balanced DIY Halloween decor ideas, keep the shapes consistent but vary their sizes and spacing. Start with a loose cluster, step back, then fill empty areas until the movement feels natural rather than crowded.
ALSO READ : Modern Minimalist Bedroom Ideas
Ghostly Cheesecloth Figures
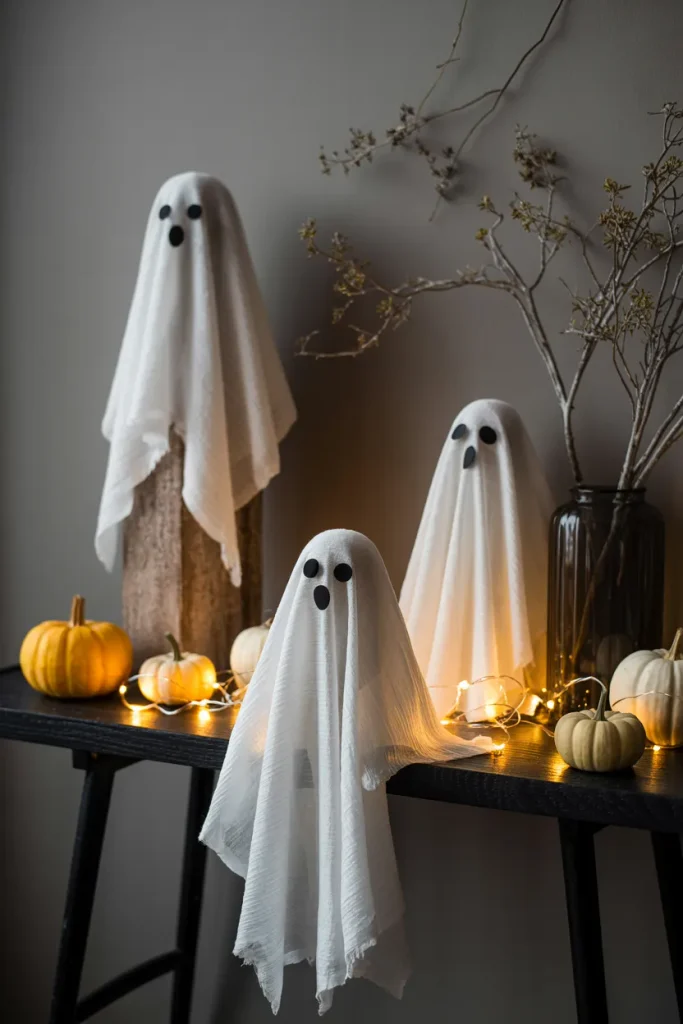
Quick Tip: Use lightweight wire or an upside-down cup beneath the cheesecloth to create the ghost shape. Mix a little fabric stiffener into the cloth if you want the figures to hold their form. Let everything dry completely before adding the eyes.
Cheesecloth creates a soft, slightly transparent effect that feels more handmade than plastic decorations. Place several figures at different heights across a mantel, shelf, or console. I’ve noticed that tiny black oval eyes keep the look playful, while oversized eyes make the ghosts feel more whimsical and kid-friendly.
Floating Witch Hat Lights
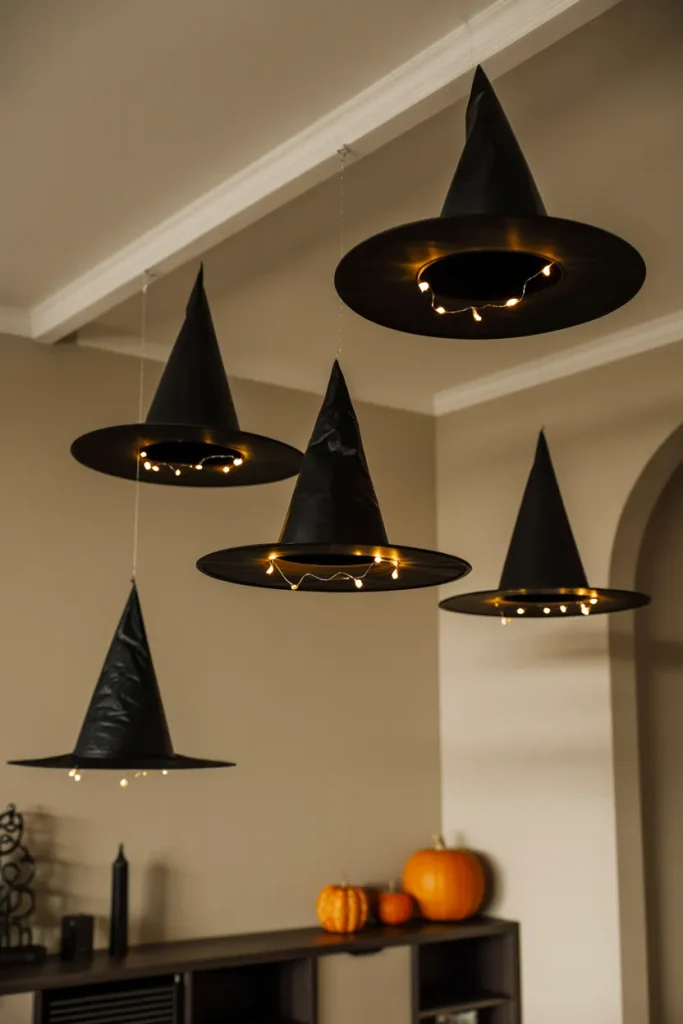
A row of floating witch hats creates a dramatic ceiling display without taking up valuable floor or table space. Choose lightweight hats and hang them with clear fishing line from secure ceiling points. Place a small battery-powered light beneath each brim for a warm, magical glow.
Keep the heights uneven so the arrangement feels natural instead of perfectly lined up. For renters, removable ceiling hooks can help reduce wall and ceiling damage, but always check the product’s weight rating first. This setup works especially well above a dining table, entryway, or Halloween party station.
Apothecary Potion Bottles
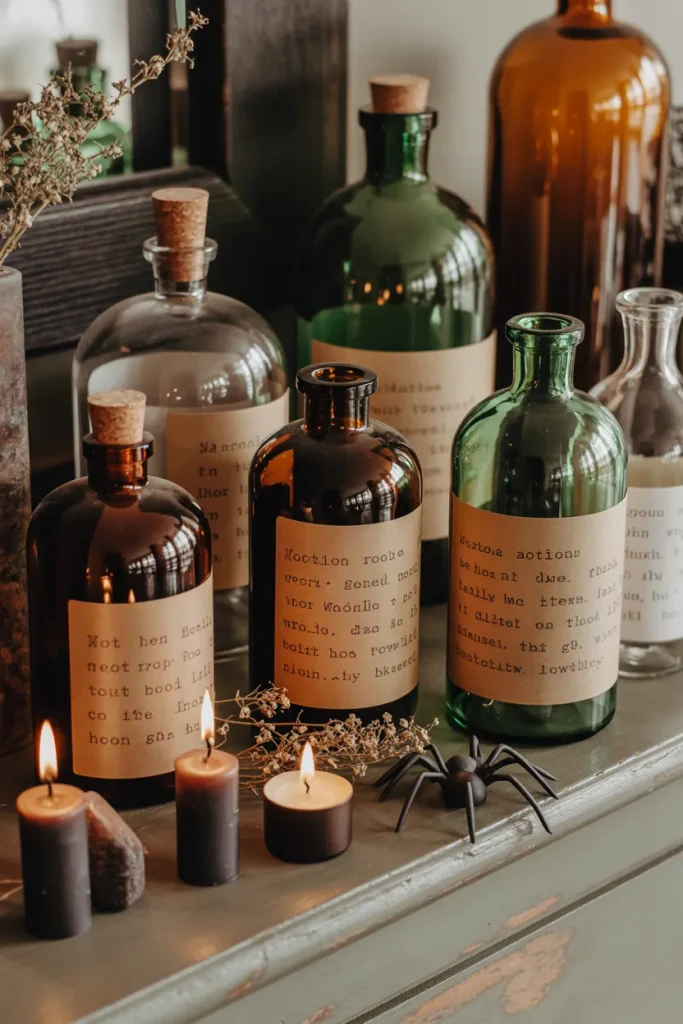
- Gather mismatched glass bottles from your recycling bin, thrifted finds, or existing kitchen collection.
- Clean and dry every bottle before decorating the outside.
- Create labels such as “Moon Dust,” “Witch’s Brew,” or “Spider Venom” using aged-looking paper.
- Attach the labels with craft glue or double-sided tape.
- Finish with corks, twine, dried herbs, or small decorative charms.
A collection of mismatched bottles feels much more convincing than identical containers lined up together. Keep the palette limited to smoky glass, brown paper, black lettering, and muted green accents. I’ve seen this type of display work particularly well on open shelving because the varying bottle heights naturally create visual layers.
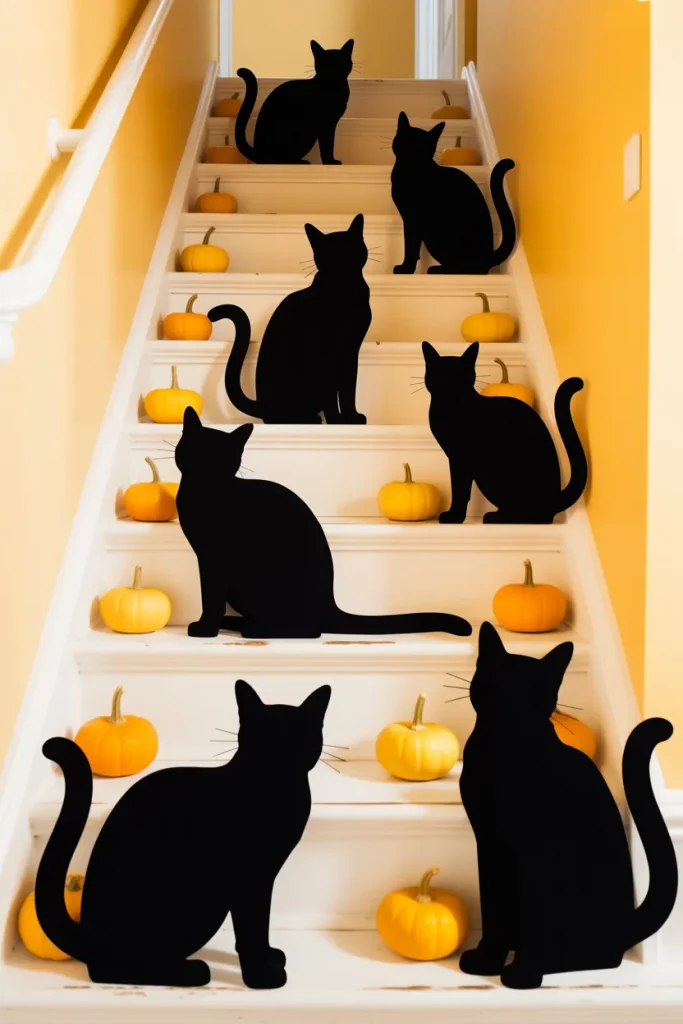
Black Cat Silhouettes
| Option A | Option B |
| Black cardstock | Black foam board |
| Lightweight and easy to cut | Sturdier for repeated use |
| Best for indoor walls | Better for larger silhouettes |
| Easy to store flat | Holds shape longer |
Black cat cutouts are an inexpensive way to create a playful Halloween scene with very little material. Position a few cats as though they are walking toward a doorway or climbing a staircase. Use removable adhesive rather than permanent glue on painted surfaces, especially in rental homes.
For extra dimension, bend the tail or ears slightly before mounting the silhouettes. A few small cats mixed with one larger shape will make the display feel less repetitive. Keep the surrounding decor simple so the sharp black profiles remain the visual focus.
Spiderweb Window Display
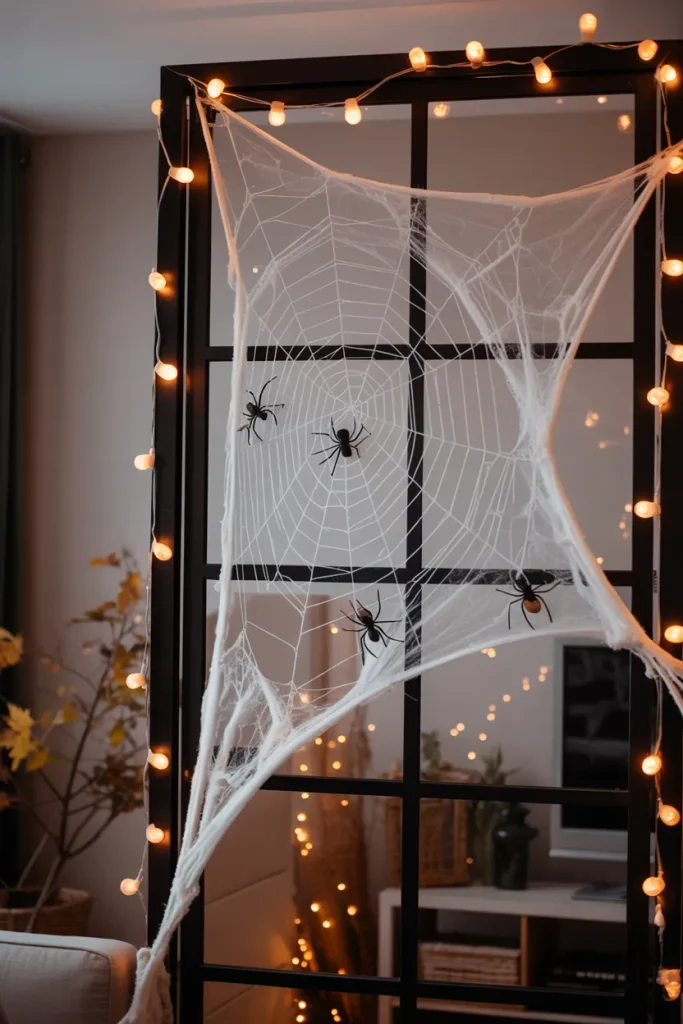
DO:
- Stretch the web unevenly across corners for a natural look.
- Add spiders in several sizes rather than clustering them together.
- Keep the center slightly open so the window still receives light.
- Pair the web with warm orange or soft white LEDs.
DON’T:
- Cover every inch of the glass.
- Pull the web into perfectly straight lines.
- Use heavy decorations that could damage the frame.
- Block windows needed for emergency exits.
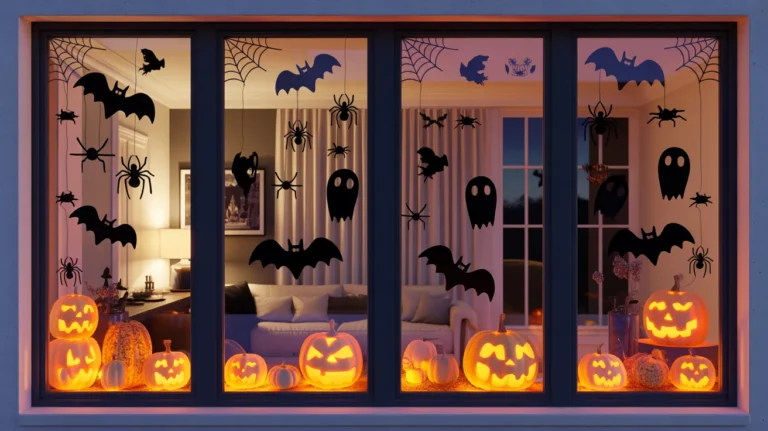
A window becomes an instant Halloween focal point with only a small amount of material. Pull the web fibers thinly to create delicate strands instead of thick clumps. In my experience, adding just three or four strategically placed spiders gives the display enough detail without making it look cluttered.
Paper Ghost Garland
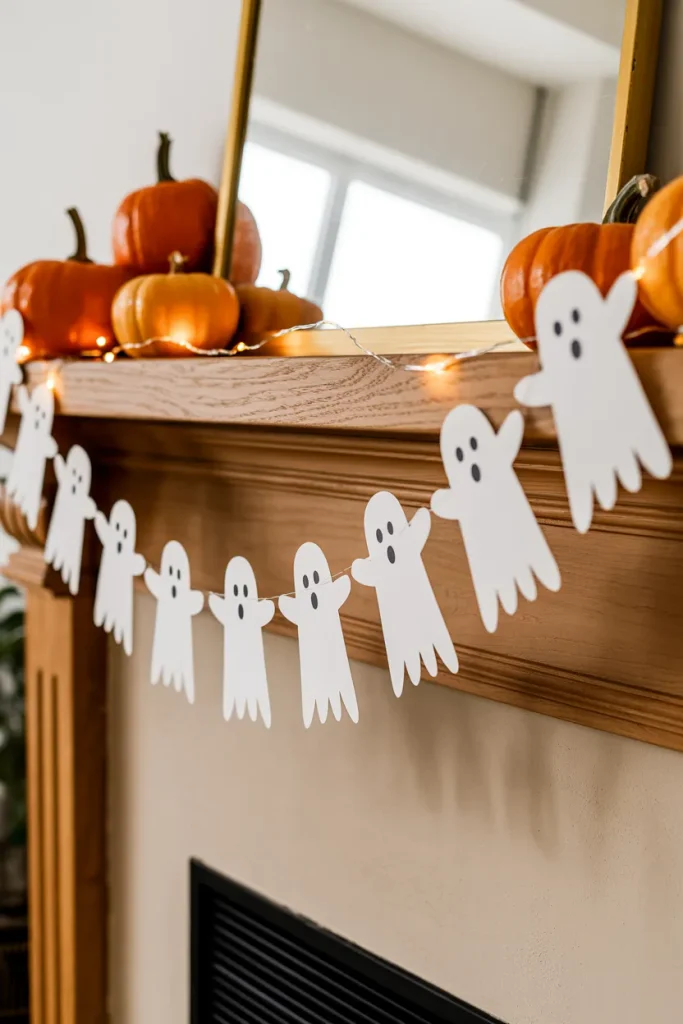
Cost: Low | Time: 30 to 60 minutes | Skill Level: Beginner | Best For: Mantels, shelves, windows
Paper ghosts are quick to make and easy to customize for different rooms. Fold white paper accordion-style, cut simple ghost shapes, and connect them with string or twine. For stronger results, use slightly heavier paper so each figure hangs neatly without curling.
Keep the faces simple because tiny details can disappear from a distance. Alternate ghost sizes and leave small gaps between them for better definition. This DIY Halloween decor works especially well above a mantel, across a bookshelf, or around a doorway where the repeating shapes naturally guide the eye.
Spooky Mirror Frame
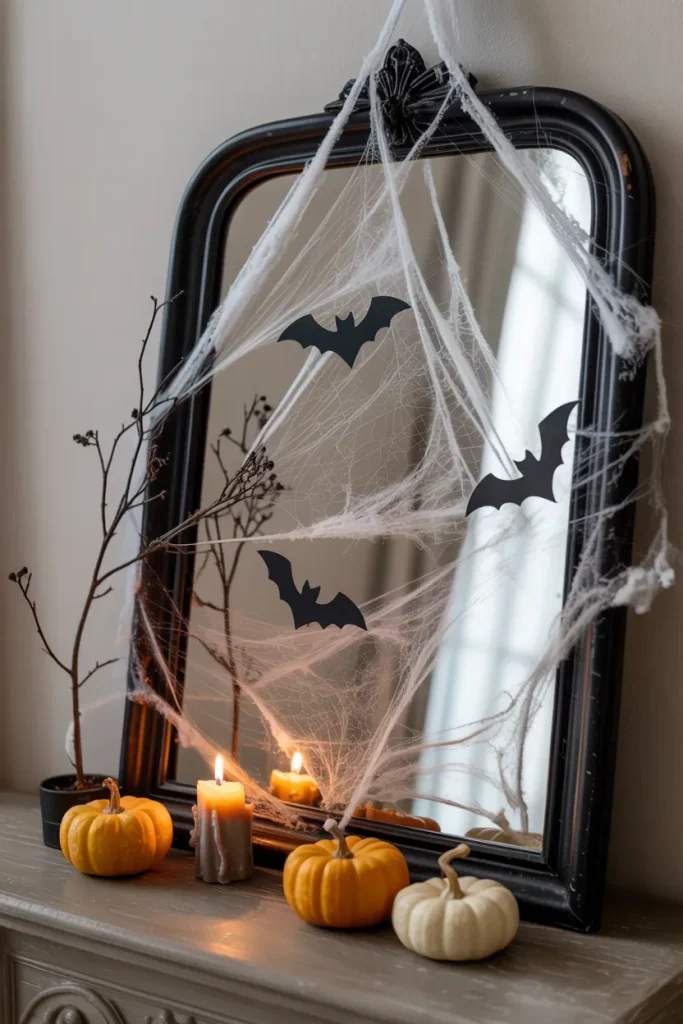
A plain mirror can become a spooky focal point with a few carefully placed details. Start by draping thin faux cobweb material across the outer corners, then add lightweight bats or small paper shapes around the frame. Keep the reflective center mostly clear so the mirror remains functional.
For a more polished result, combine only two or three decorative elements instead of covering the entire frame. A black frame already provides strong contrast, so orange accents can stay small. This approach suits entryways and dining rooms where Halloween decor needs to feel festive without overwhelming the existing interior.
Witch Broom Entry Display
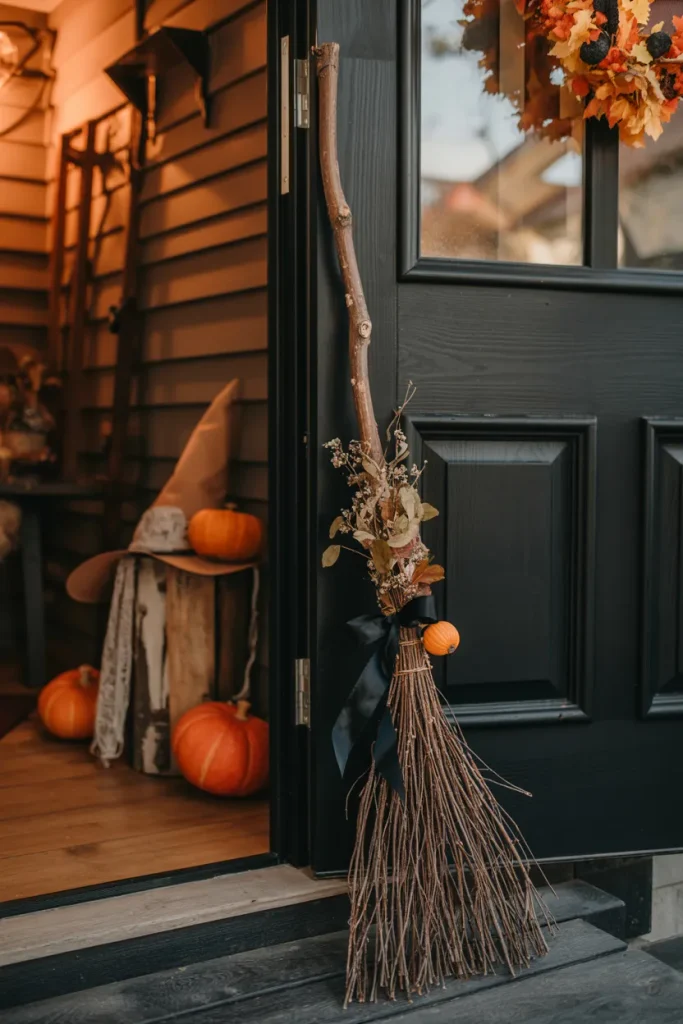
1. Gather the materials: Choose a sturdy twig broom, black ribbon, faux leaves, and a few lightweight Halloween accents.
2. Decorate the handle: Wrap black ribbon around the upper section, leaving loose ends for a casual finish.
3. Add seasonal details: Tie on dried leaves, a small tag, or a miniature pumpkin near the handle.
4. Position the broom: Lean it securely beside the front door, preferably against a wall or sturdy planter.
A decorated broom adds Halloween personality right where guests first arrive. Keep the arrangement narrow so it does not interfere with the doorway or walkway. For outdoor displays, choose weather-resistant materials and bring fabric accents inside during heavy rain. A simple broom can become the anchor for a small porch vignette.
Tin Can Pumpkin Lights
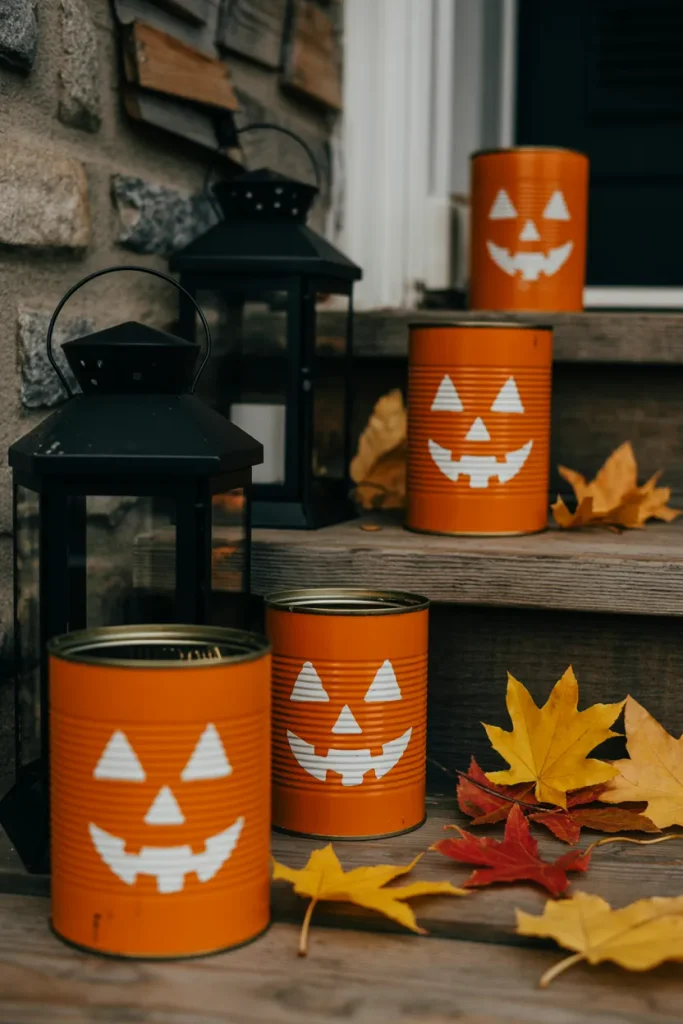
Step 1: Wash and dry several empty tin cans, removing sharp edges around the openings.
Step 2: Draw simple pumpkin faces on paper, then use them as guides for marking the can surfaces.
Step 3: Carefully punch the marked shapes with a suitable tool, keeping the openings evenly spaced.
Step 4: Paint the cans orange and allow them to dry fully before handling.
Step 5: Place battery-operated lights inside and arrange the finished lanterns together.
Recycled cans make sturdy little lanterns that can be reused for future Halloween displays. Keep the faces simple so the light shines clearly through the openings. Battery-operated LEDs are the practical choice because they produce less heat and avoid the risks associated with open flames.
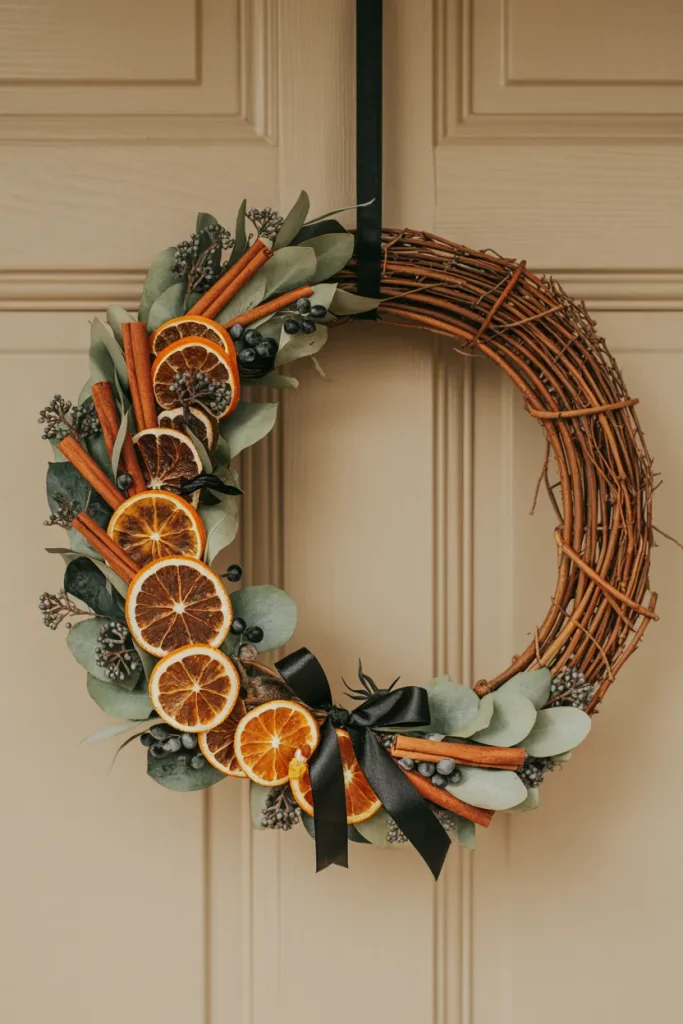
Dried Orange Halloween Wreath
| Option A | Option B |
| Fresh orange slices | Store-bought dried slices |
| Requires drying time | Ready for immediate crafting |
| Bright natural color | Consistent appearance |
| Best for DIY projects | Best for quick decorating |
A dried orange wreath brings seasonal warmth to Halloween without relying on heavy plastic decorations. Layer orange slices with dark greenery and a black ribbon for contrast. The natural textures soften the darker Halloween elements and make the door feel festive without looking overly theatrical.
Secure every piece firmly with floral wire or strong craft adhesive, especially if the wreath will hang outdoors. Keep the design slightly asymmetrical for a relaxed handmade appearance. If your doorway already has strong color, use fewer orange pieces and let the natural grapevine base provide most of the visual texture.
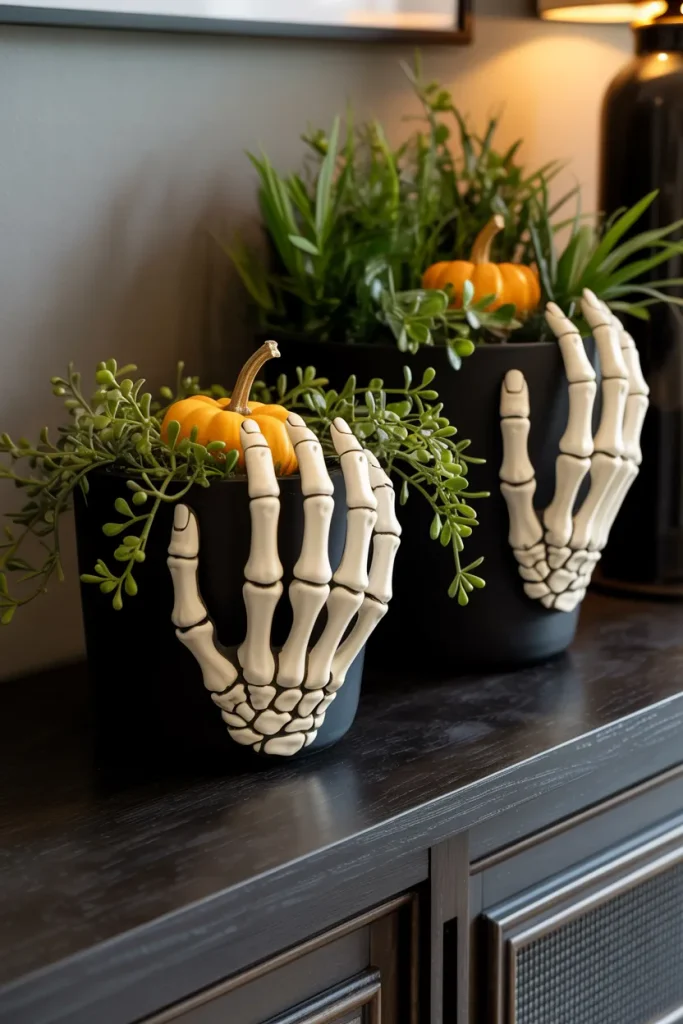
Skeleton Hand Planters
DO:
- Use lightweight faux skeleton hands around sturdy planters.
- Choose trailing plants to soften the spooky shapes.
- Keep pots in black, charcoal, or muted terracotta.
- Add one small pumpkin for a seasonal color accent.
DON’T:
- Overcrowd the planter with too many decorations.
- Use heavy props that could tip the pot.
- Place delicate plants in areas with poor lighting.
- Cover drainage holes with decorative materials.
A skeleton hand gripping a leafy plant creates an unexpected mix of spooky and natural textures. Secure the hands around the planter rim with removable adhesive or floral wire. I’ve noticed that trailing greenery works particularly well because the leaves partially frame the hands while keeping the arrangement fresh and visually interesting.
Raven Branch Arrangement
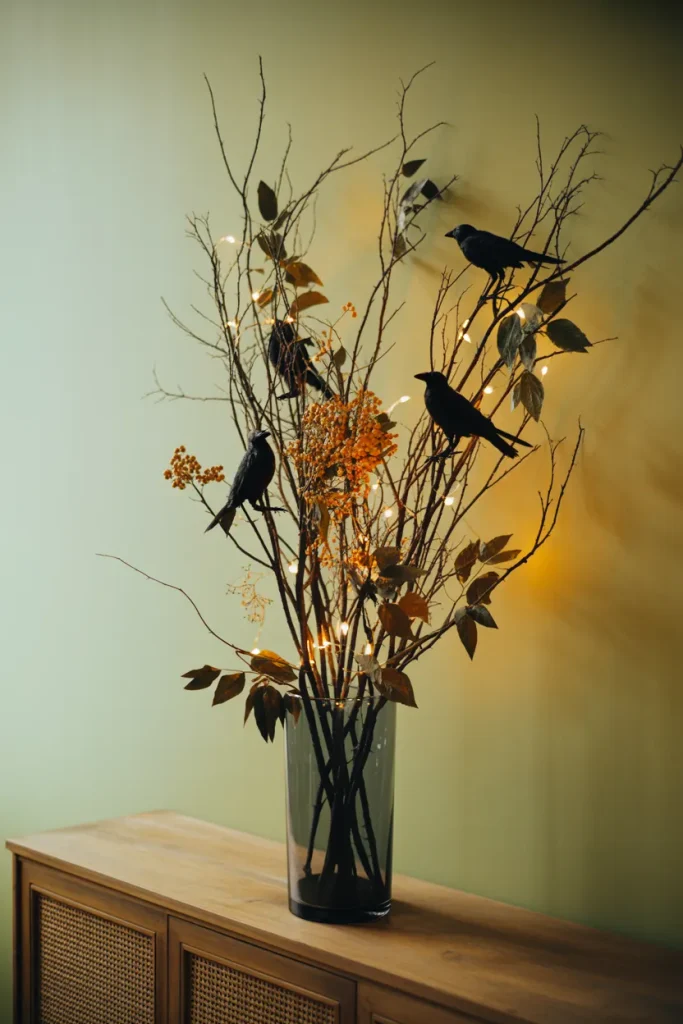
Cost: Low | Time: 45 minutes | Skill Level: Beginner | Best For: Consoles, dining tables, mantels
Bare branches can become a dramatic Halloween centerpiece with very little effort. Collect dry branches that are already fallen, clean them thoroughly, and place them in a stable vase. Add lightweight faux ravens, dried leaves, or small ornaments to create height without making the arrangement heavy.
A few warm fairy lights tucked between the branches can add subtle evening sparkle. Choose a narrow vase for dining tables so the arrangement does not block conversation across the table. For a stronger gothic look, use black accents against cream, beige, or weathered wood surroundings.
Hanging Ghost Balloons
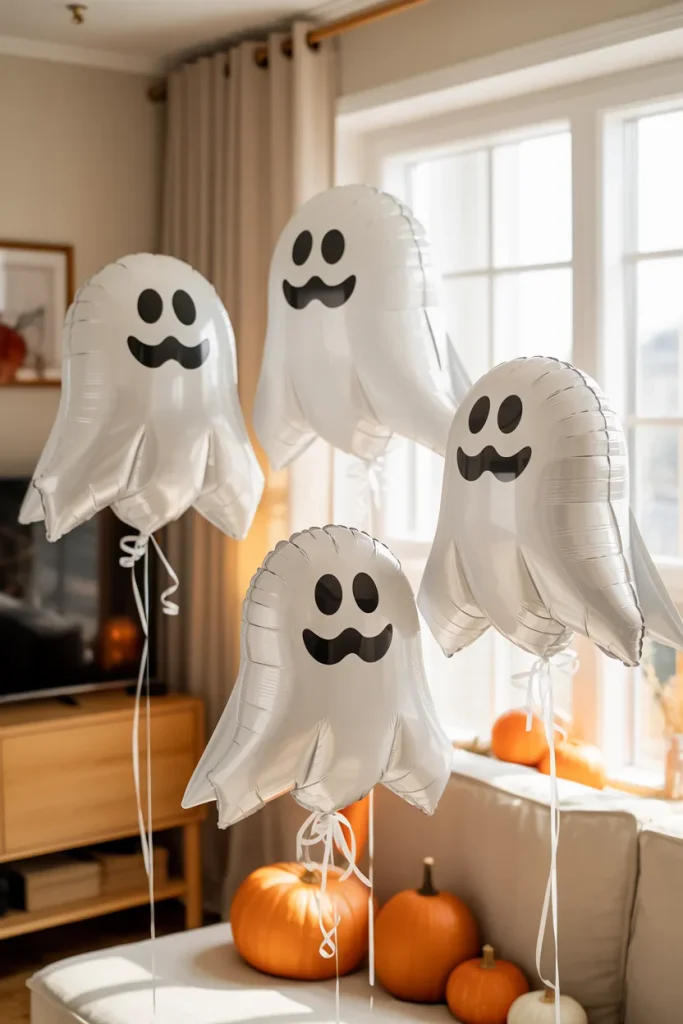
Hanging ghost balloons bring a playful touch to Halloween parties without requiring complicated crafting. Use white balloons and draw simple faces with a suitable marker. Tie each balloon with white ribbon, then vary the lengths so the ghosts appear at different heights.
Keep the balloons away from sharp furniture edges, candles, heat sources, and ceiling fans. For longer-lasting displays, consider air-filled balloons attached to lightweight sticks or wall mounts instead of helium. A small group above a dessert table or entry console can provide plenty of visual impact without filling the entire room.
Haunted Book Stack
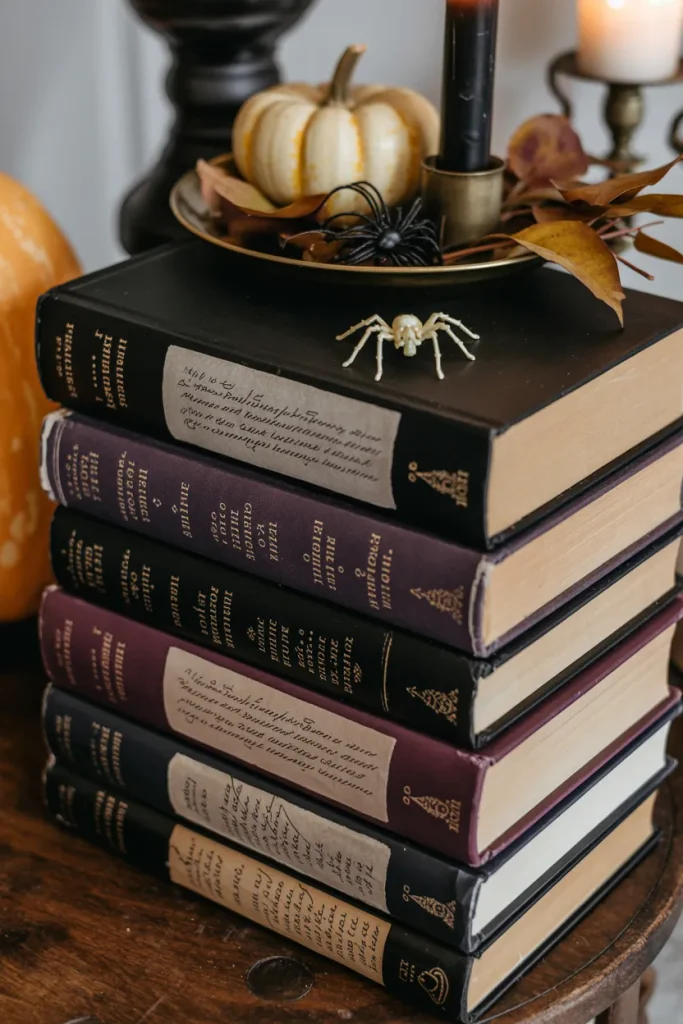
- Collect three to five old hardcover books with sturdy covers.
- Wrap or paint the covers in black, charcoal, brown, or deep purple.
- Add simple handwritten labels such as “Spells,” “Potions,” or “Ghost Stories.”
- Stack the books from largest to smallest for a stable display.
- Finish with one pumpkin, dried branch, or faux spider.
A spooky book stack works beautifully on coffee tables, shelves, and consoles because it adds height without taking much space. Keep the colors muted so the arrangement feels cohesive with existing decor. For a more aged appearance, lightly brush the edges with brown craft paint and let some original paper texture remain visible.
Mummy Candle Jars
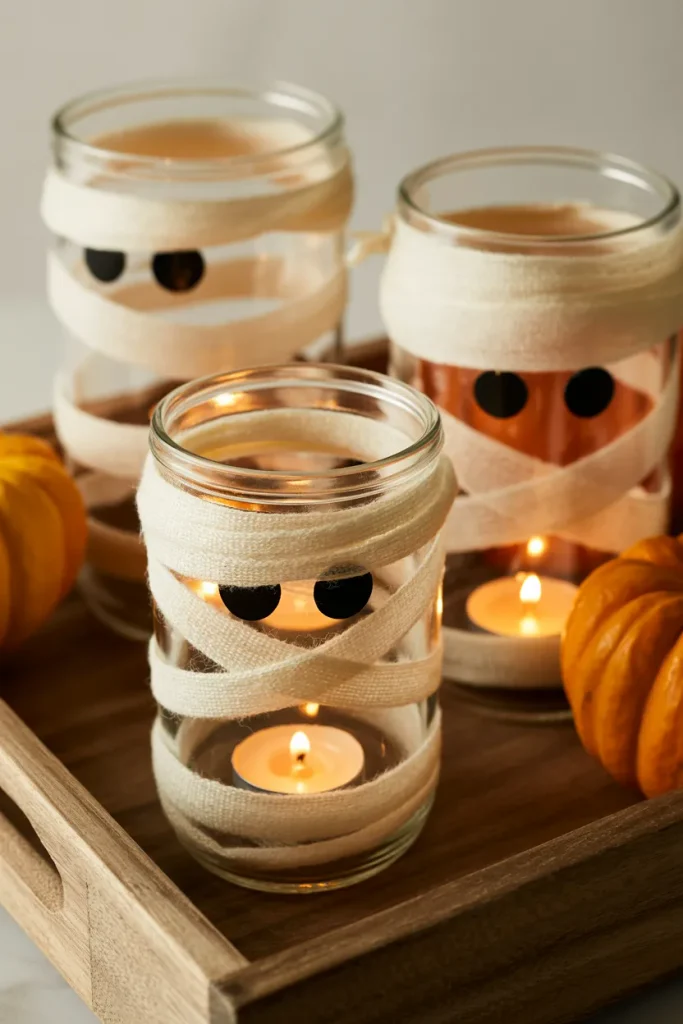
Quick Tip: Wrap the gauze loosely rather than pulling it tightly around the jar. Leave small gaps around the glass so the LED glow can shine through. Use battery-powered tea lights for a safer display, especially on tables near curtains or other fabrics.
These mummy jars turn inexpensive containers into playful Halloween lighting. Start with clean glass jars, secure the gauze with craft glue, and add small black paper eyes near the upper section. Vary the wrapping on each jar so they look handmade rather than identical. Group three together for a simple centerpiece or shelf accent.
Pumpkin Door Hangers
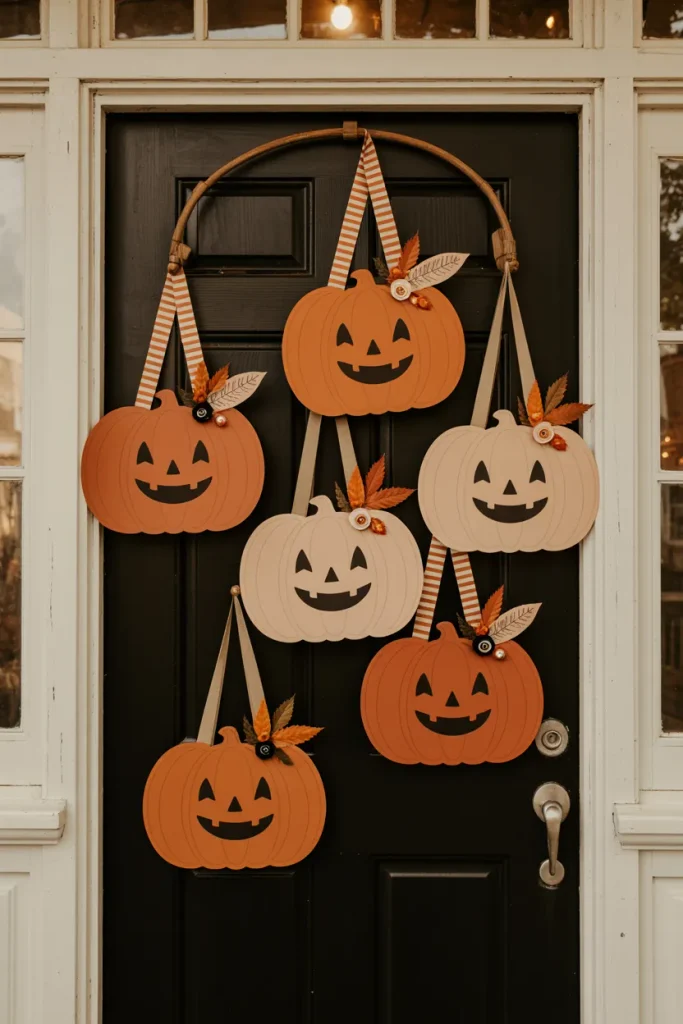
BEFORE: A plain front door can feel disconnected from the seasonal decorations around the porch. A single wreath may also feel too formal for a playful Halloween theme.
AFTER: Several lightweight pumpkin hangers add color and personality around the door without requiring permanent changes. Different shapes and ribbons create a layered handmade display.
Choose weather-resistant cardstock or lightweight wood if the hanger will stay outside. I’ve noticed that simple faces usually read better from the sidewalk than detailed designs. Hang the pieces at slightly different heights, but leave enough clearance for the door handle and opening path.
Creepy Hand Candle Holders
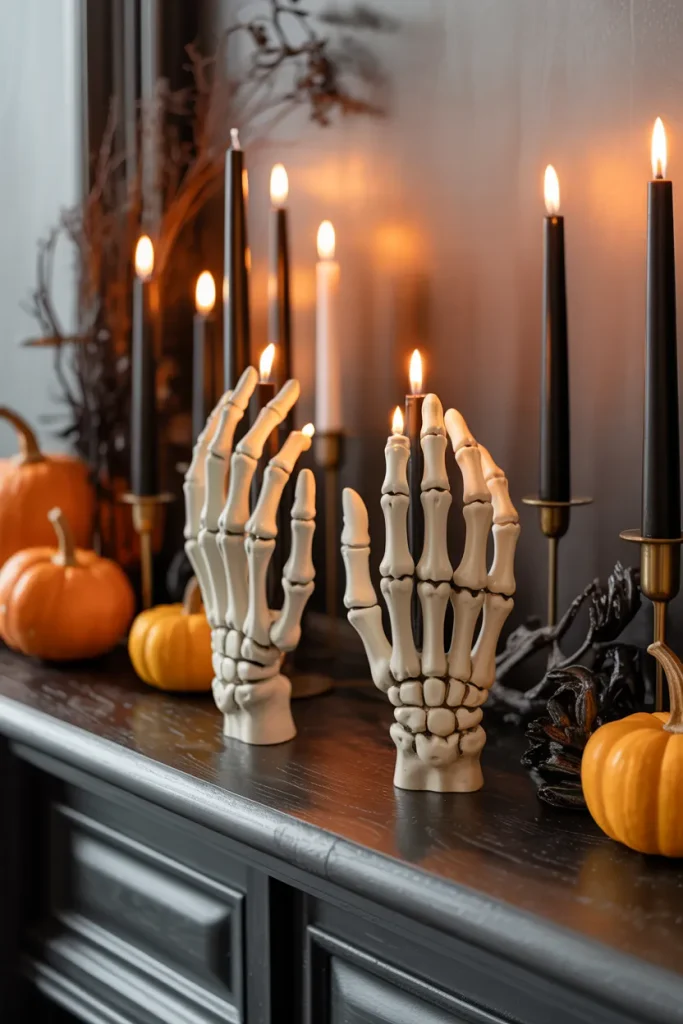
1. Prepare the hands: Choose sturdy faux skeleton hands or hand-shaped craft pieces that can safely support lightweight LED candles.
2. Add candle cups: Attach small candle holders or shallow bases so the lights sit securely instead of resting directly on the fingers.
3. Build the display: Arrange the hands at different heights using books, trays, or small risers.
4. Finish the scene: Add a few pumpkins, dried branches, or black accents around the base.
A creepy hand display works best when the surrounding decor stays restrained. Battery-operated candles provide the warm glow without placing fabric or paper near an open flame. Position the tallest hand toward the back and shorter pieces in front to create clear layers that photograph well for Pinterest.
Black Lace Table Runner
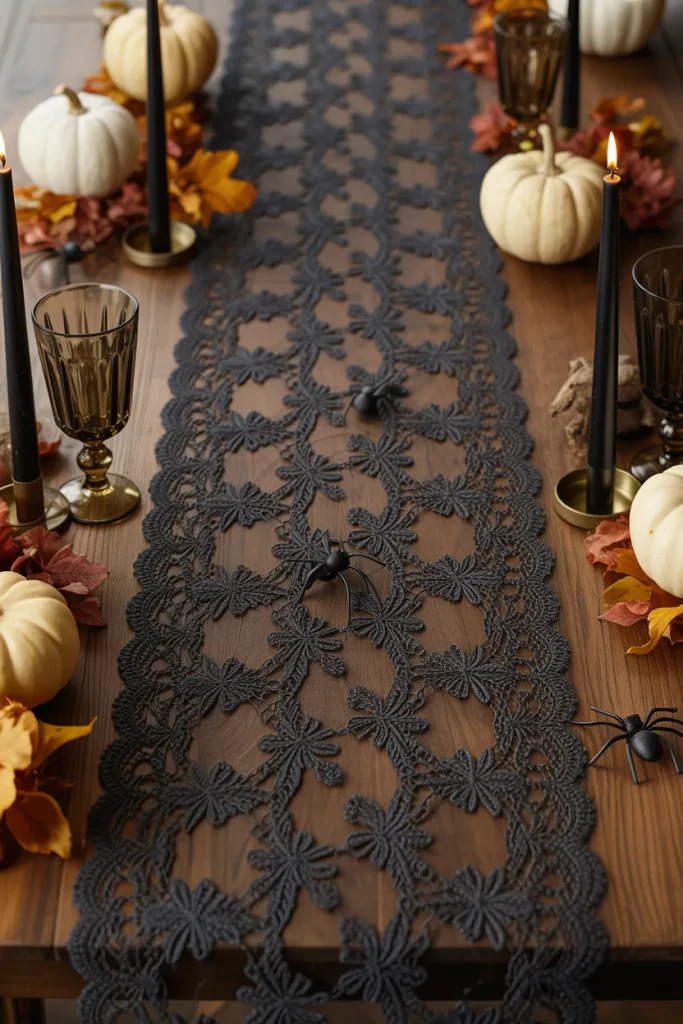
| Option A | Option B |
| Traditional lace | Cut paper lace |
| Soft fabric texture | Lightweight and disposable |
| Reusable each year | Quick budget project |
| Best for dining tables | Best for temporary parties |
A black lace runner instantly gives a dining table a darker Halloween character while keeping the base simple. Layer it over natural wood, cream linen, or a neutral tablecloth so the lace pattern remains visible. Add small orange pumpkins rather than filling the surface with multiple decorations.
For a handmade version, cut a repeating spiderweb pattern from sturdy black paper. Keep the runner narrower than the table so the edges of the underlying surface remain visible. This simple contrast helps the centerpiece stand out and keeps the table practical for serving food and drinks.
Cardstock Witch Feet
DO:
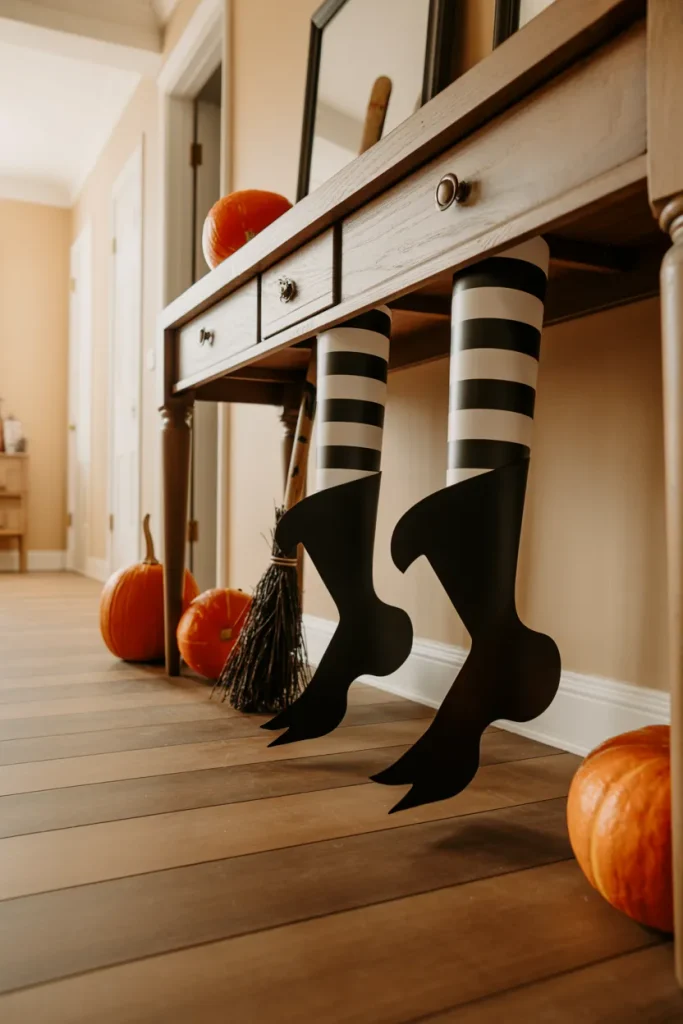
- Cut two matching shoe shapes from sturdy black cardstock.
- Use striped paper for the visible stocking sections.
- Position the feet beneath furniture with enough clearance.
- Secure pieces with removable adhesive for temporary displays.
DON’T:
- Attach paper near heaters or open flames.
- Block walkways with oversized decorations.
- Use flimsy paper for high-traffic areas.
- Cover electrical outlets or floor vents.
Witch feet are especially useful for decorating overlooked spaces that normally receive little attention. Slide the finished shapes beneath a console, cabinet, or side table so only the legs and shoes are visible. Keep nearby decorations low and simple, allowing the unexpected silhouette to create the main Halloween moment.
Halloween Shadow Lanterns
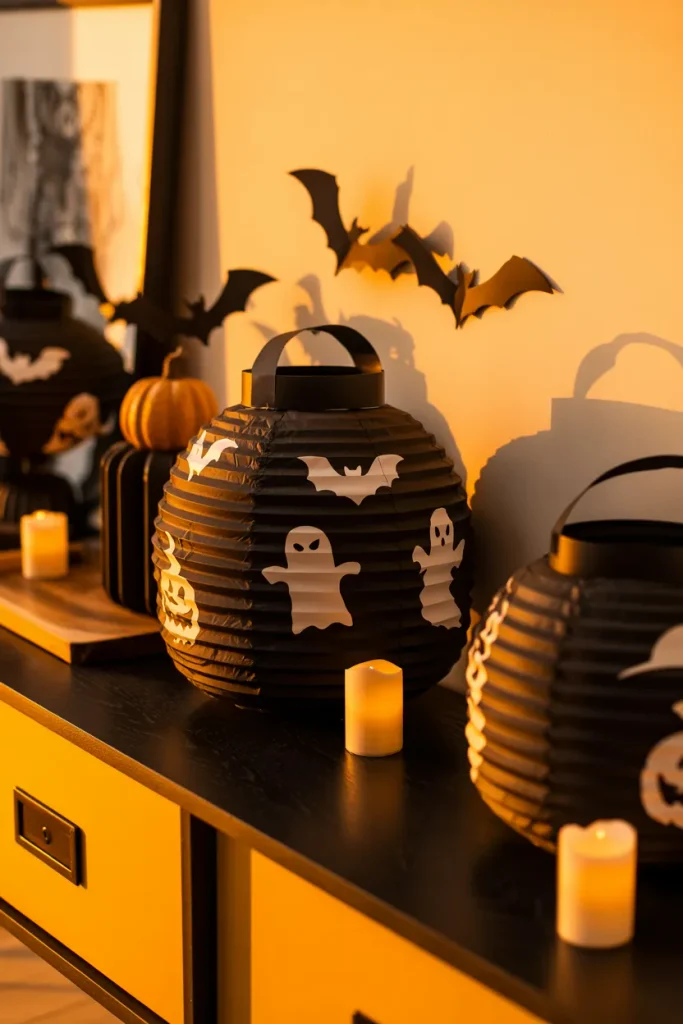
Cost: Low | Time: 1 to 2 hours | Skill Level: Beginner | Best For: Shelves, tables, mantels
Paper lanterns become much more interesting when their cutout shapes cast shadows around the room. Use black cardstock for a stronger silhouette, then place battery-powered LED lights inside each lantern. Leave enough open space around the cutouts so the light can pass through clearly.
I’ve seen shadow displays work especially well in dim corners where ordinary decorations might disappear. Place the lantern several inches away from a wall to create softer, larger shapes. For a party, make several designs with different patterns so the shadows vary across the room.
Ghostly Window Curtains
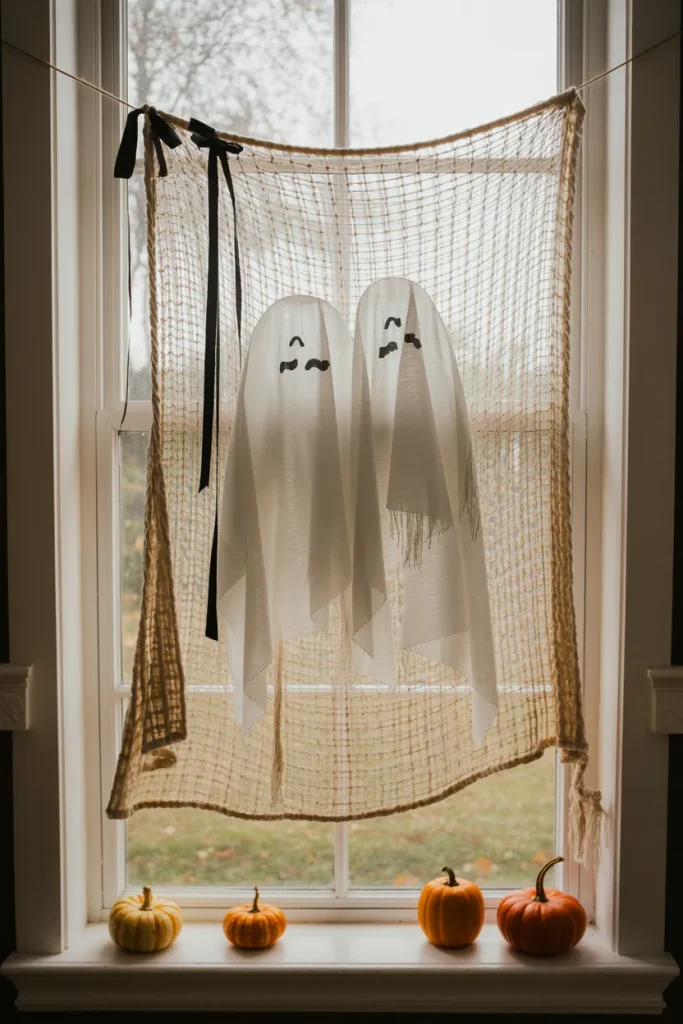
A plain window treatment can become part of the Halloween decor with a few lightweight additions. Start with sheer white curtains or gauze fabric, then attach simple black ghost faces made from removable paper pieces. Let some fabric hang loosely for a soft, wispy appearance.
Step 1: Measure the curtain area before choosing your fabric or gauze.
Step 2: Add small ghost faces using removable adhesive or fabric-safe pieces.
Step 3: Layer a second strip of gauze near the sides for extra texture.
Step 4: Keep the center opening clear if the window needs regular access.
Step 5: Add one or two small pumpkins along the sill to connect the colors.
The finished window feels seasonal without requiring a permanent change to the room. Choose sheer materials if you still want plenty of natural light during the day. Avoid placing fabric close to candles, heaters, or other heat sources, and secure loose pieces so they do not become a tripping hazard.
DIY Coffin Shelf Display
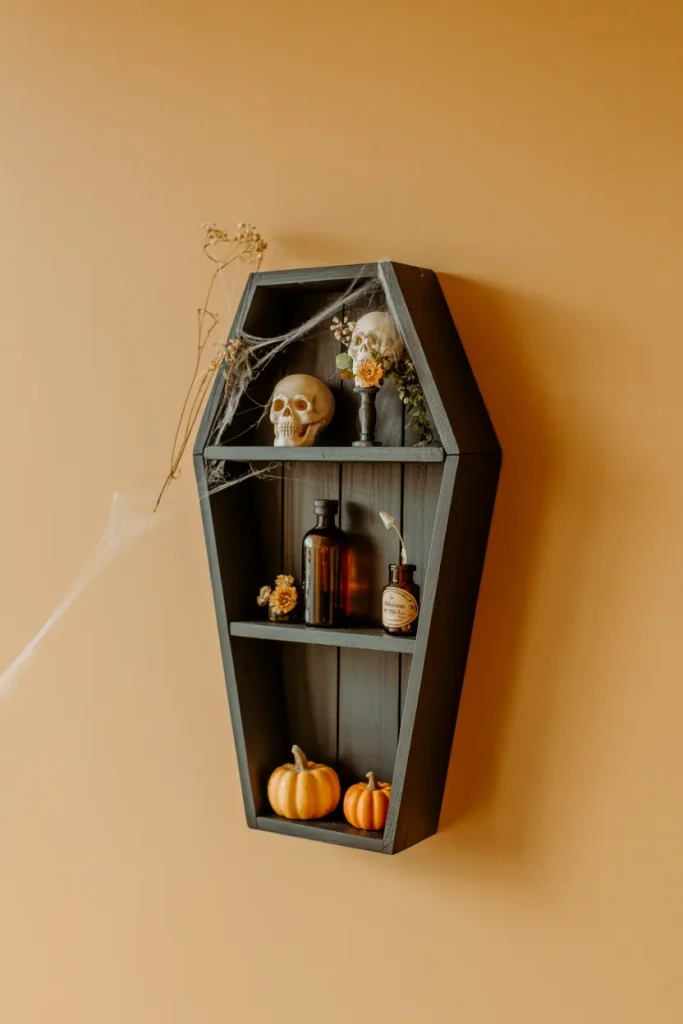
| Feature | Simple Version | Detailed Version |
| Base | Cardboard coffin | Thin wooden coffin |
| Finish | Black paint | Distressed black paint |
| Decor | Paper skulls | Mixed faux props |
| Placement | Shelf display | Wall-mounted feature |
A small coffin shelf creates a dedicated Halloween focal point without taking over the room. Cardboard works for a temporary party display, while thin wood is better if you plan to reuse it each October. Keep heavier objects toward the bottom and use lightweight decorations near the top.
Add miniature bottles, faux skulls, dried flowers, or tiny pumpkins to build layers inside the shape. Avoid filling every corner because the black coffin outline is part of the design. A few carefully positioned objects will give the display a cleaner, more intentional appearance.
Witch Hat Centerpiece
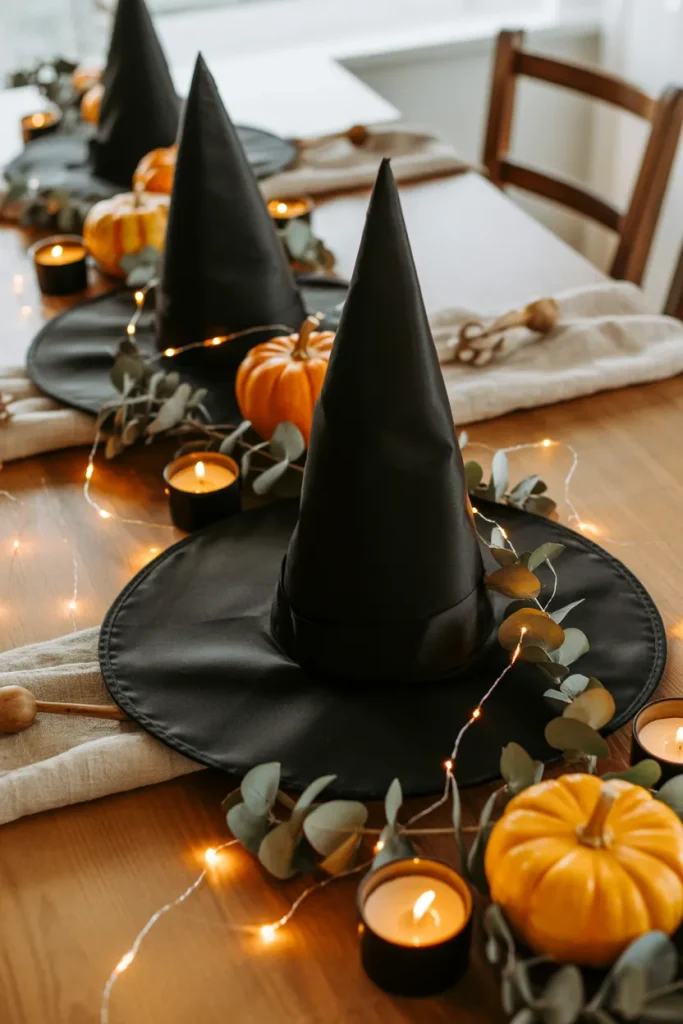
DO:
- Choose hats in two or three different sizes.
- Place the tallest hat in the center for visual height.
- Add small pumpkins around the base.
- Use warm LED lights to create a soft evening glow.
DON’T:
- Fill the table with too many props.
- Use tall pieces that block conversation.
- Mix too many unrelated colors.
- Place real flames close to fabric hats.
A simple group of witch hats can anchor a Halloween dining table without requiring elaborate crafting. Add a narrow black ribbon around each hat for extra definition, then scatter a few dried leaves around the base. Keep the centerpiece low enough for guests to see across the table comfortably during meals.
Conclusion
Halloween decorating can be simple, affordable, and genuinely creative when you work with materials you already have. From glowing jars and paper garlands to spooky door displays and handmade centerpieces, these DIY Halloween Decor Ideas give you plenty of ways to personalize your home for 2026.
Start with one project that fits your space and budget, then build from there. I’ve seen how small handmade details can completely change the atmosphere of a room. Save this post on Pinterest so you can return to your favorite projects, try a few ideas yourself, and share the article with friends or family who love crafting. Happy decorating!